A GUIDE ON HOW TO REMOVE BUILDER GEL
·

·
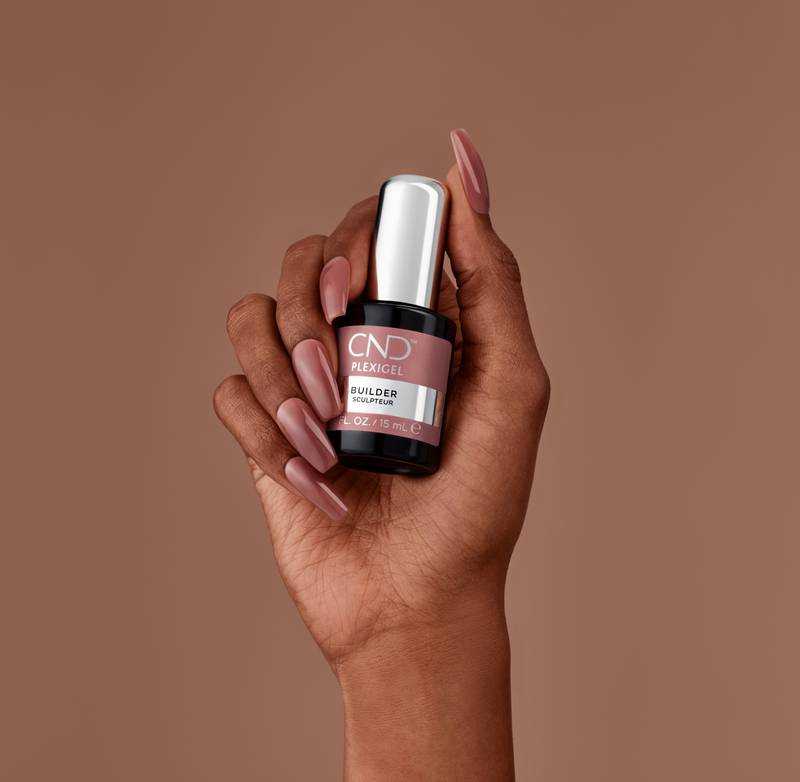
CND™ PLEXIGEL has become a staple in the realm of nail enhancements, providing durability, flexibility and stunning aesthetics. You can either use one of the neutral PLEXIGEL shades, or finish with your favourite CND™ SHELLAC™ colour!

As with any nail treatment, the time may come when you want to change up your look or give your natural nails some breathing room. Fear not! Removing CND™ PLEXIGEL can be a straightforward process when approached with care and attention. In this guide, we'll walk you through the steps for a seamless removal experience.
What You'll Need:
Remover: Choose a high-quality acetone or moisturising remover like OFFLYFAST™ to ensure an effective and efficient removal process.
Cotton Balls or Pads: These will be used to soak the nails in acetone.
Aluminum Foil: Cut into small squares to wrap around each finger securely.
Nail File: To gently remove the top layer of PLEXIGEL.
Shop our convenient CND™ OFFLY FAST GEL REMOVAL KIT here.

Step 1: Gentle Filing
Start by gently filing the top layer of the PLEXIGEL with a nail file. This step is crucial to break the seal and allow the acetone to penetrate effectively. Be gentle, and avoid excessive filing to minimize potential damage to the natural nails.
Step 2: Soaking
Soak small pieces of cotton balls or pads in acetone and place them on top of each nail. To keep them in place, wrap aluminum foil around each finger. Allow the nails to soak for approximately 10-15 minutes. This helps to soften and dissolve the PLEXIGEL.
Step 3: Removal
After soaking, carefully unwrap each finger and use a gentle twisting motion to remove the softened PLEXIGEL. If needed, you can use a wooden cuticle stick to help lift the product, but avoid excessive force to prevent damage to your natural nails.
Step 4: Cleanse and Nourish
Once the PLEXIGEL is removed, use a nail buffer to smooth the surface of your natural nails. Follow up with a generous application of cuticle oil to replenish moisture and promote healthy nail growth.
Step 5: Final Touches
Give your nails a thorough wash to remove any residual acetone, and voilà! Your natural nails are revealed, and you're ready for a fresh start or a new nail art adventure.

Aftercare
After the removal of gel or acrylic nails, it's essential to apply nail treatments to promote the health and resilience of your natural nails. The process of gel or acrylic removal, especially if done incorrectly or too frequently, can leave the nails weakened, dehydrated and more prone to damage. We recommend applying a nourishing cuticle oil to replenish moisture and restore the lipid barrier, preventing nails from becoming excessively dry and brittle, alongside a nail strengthener to reinforce and harden the nails, reducing the risk of brittleness and promoting overall nail resilience.

With these steps, you can confidently and comfortably remove CND™ PLEXIGEL, ensuring that your nails remain healthy and beautiful. Embrace the flexibility and elegance that comes with CND™ PLEXIGEL, and enjoy the freedom to switch up your nail style whenever inspiration strikes!